A tutorial for building and deploying websites using RMarkdown and GitHub
Biplabendu Das
15 September, 2024
This tutorial shows how to deploy a website, hosted on GitHub Pages for free, using RMarkdown.
To make the process highly accessible, I have created a dummy website that provides a template for building a professional website with two pages: a homepage and a webpage for describing your research experience. The template can be customized for your needs by renaming and repurposing the individual pages.
The process can be broken down to three steps:
- Make a copy of the website on your GitHub, and deploy it on GitHub Pages.
- Change the style and content of your html webpages using RMarkdown on your local computer.
- Update your online website by pushing the local changes to GitHub.
Note, every time you make any local changes to your website (Step 2), you need to use step 3 to update it on the web.
Video tutorial
Source: Workshop hosted by Billu in September, 2024.
Step 1: Deploy website
1.1 Clone the template
We will make a copy of the dummy website by forking the
repository on GitHub. So, the first thing we need is a registered GitHub
account. If you do not have a GitHub account, use the following
guidelines to do so:
- Go to Github and register an account by providing the following information.
- email: your_email_id
- password: your_password
- user name: your_user_name Pick your username carefully
The address of your website will be https://your_user_name.github.io/your_project_name
For example, my user name is biplabendu and my website is deployed as: https://biplabendu.github.io/homepage
Go to the GitHub repository for the dummy website: here
Click the
Forkbutton on the top-right of the repository, which opens a setup page where you can customize the name of your repository.The name of the repository will be the default name in your website link (see above). Pick something that you like. I will change it to “homepage”. Make sure “Copy the main branch only” is checked. Click “Create fork”.
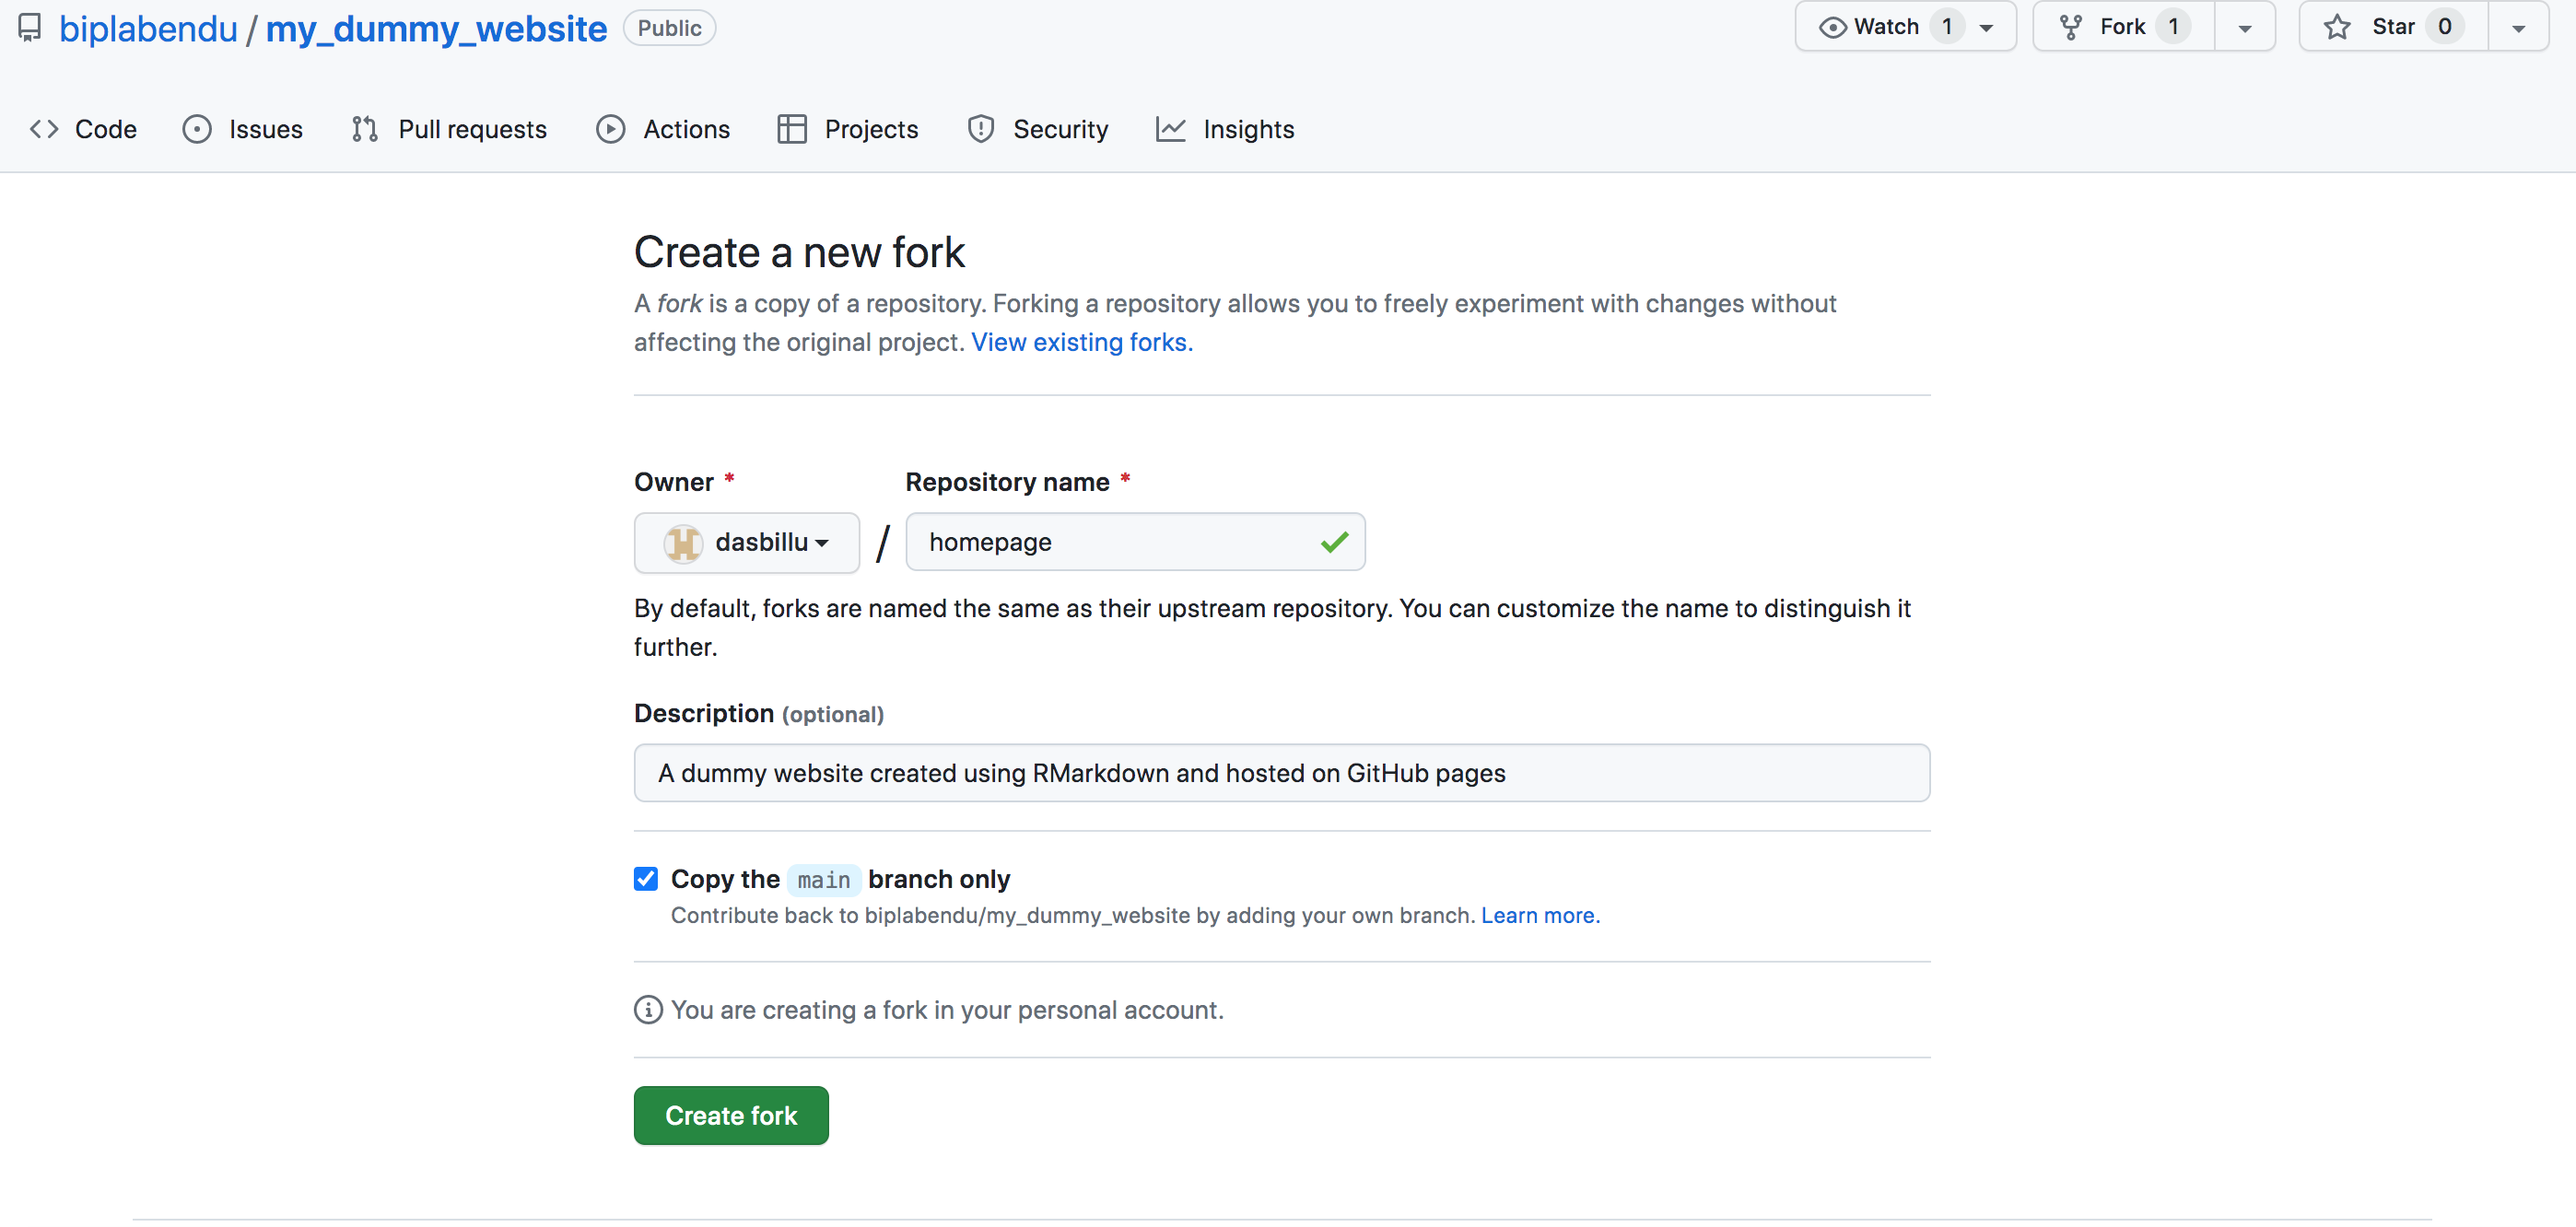
Creating a fork.
1.2 Deploy the website
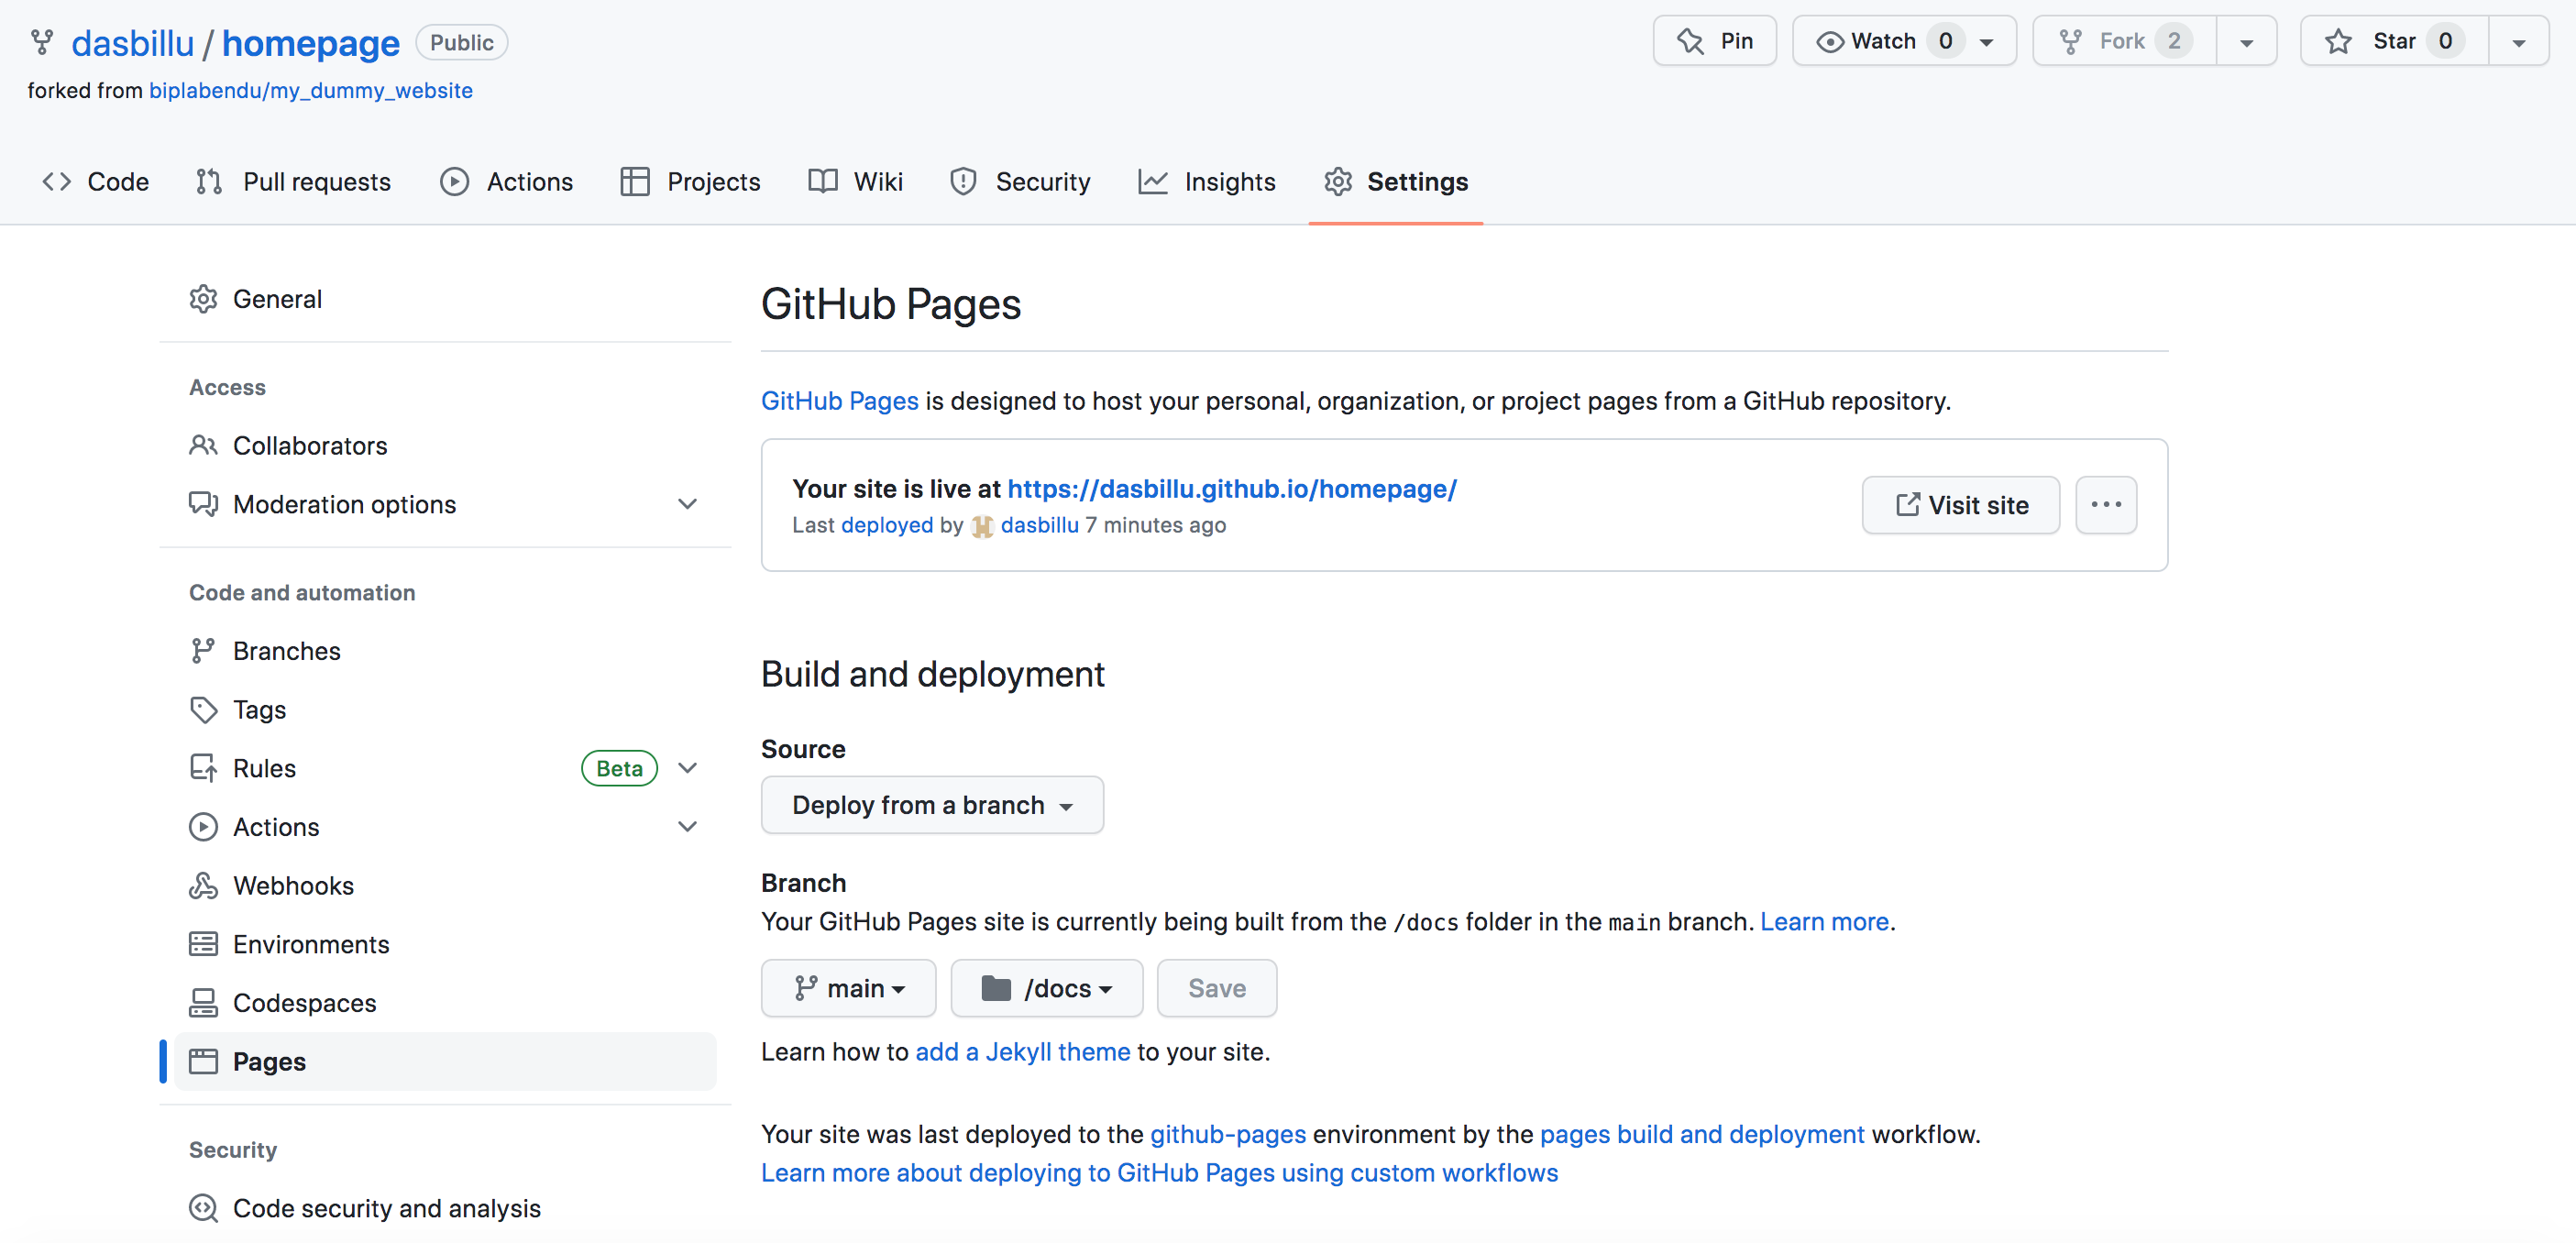
Go to
Settings. If you have not changed the name of your repository, I would recommend you do it at this step.Select
Pagesin theCode and automationsection on the left navigation pane.

Setup GitHub Pages.
- Check that
Sourceis selected asDeploy from a branch. SelectBranchasmain, which should automatically select/(root)as the subfolder. Change/(root)to/docsbecause our html files are not in the folder calleddocs. If all looks good, selectSave.
Deploy website
That’s it, your website is being created and deployed. If you do not see a link for your website at the top of the
Pages, please give it a minute and refresh. This might take a couple of minutes.Once your link is ready, click on it and see if it worked. You should arrive at a website with your custom user name and repository name, which looks like below.
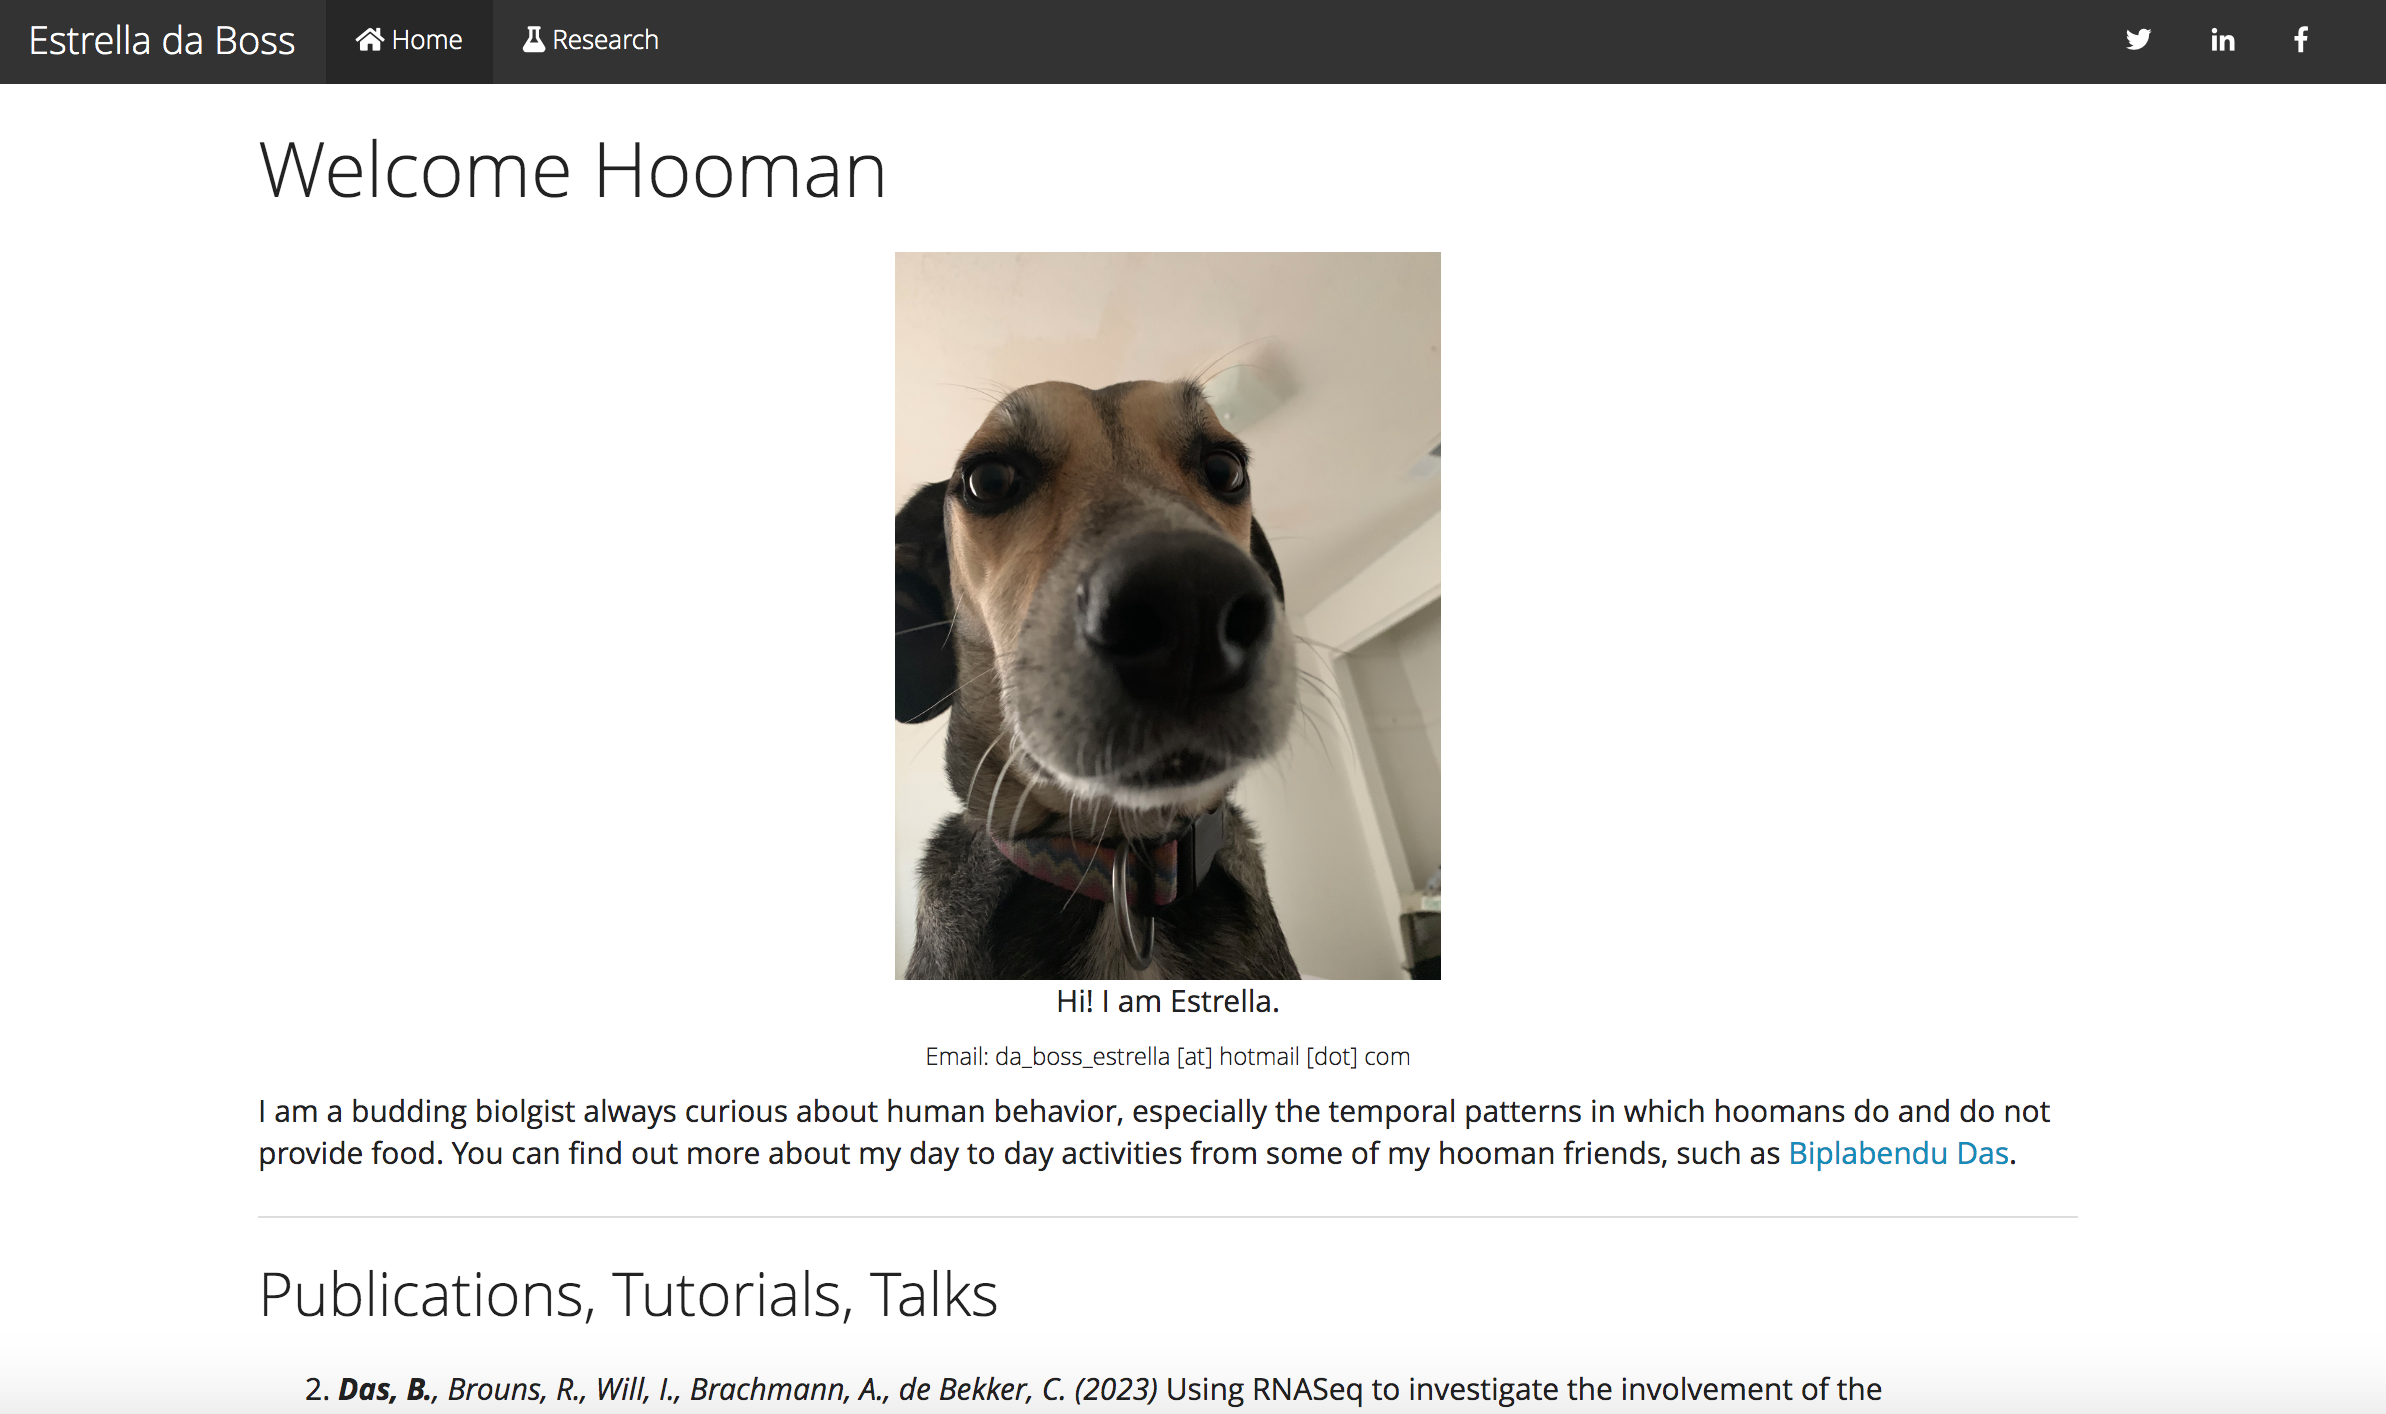
Dummy website template.
Step 2: Making modifications
2.1 Linking GitHub and RStudio
Get a copy of the repository on your local computer using GitHub Desktop. If you don’t have it installed on your computer, you can do iter by visiting this website.
Open GitHub Desktop and sign in to your account. You might have to allow authorization by clicking the
signing in on the weboption on your login screen.While keeping GitHub Desktop open, click on
File->Clone repository.A new window opens where you should see your newly created repository. See below.
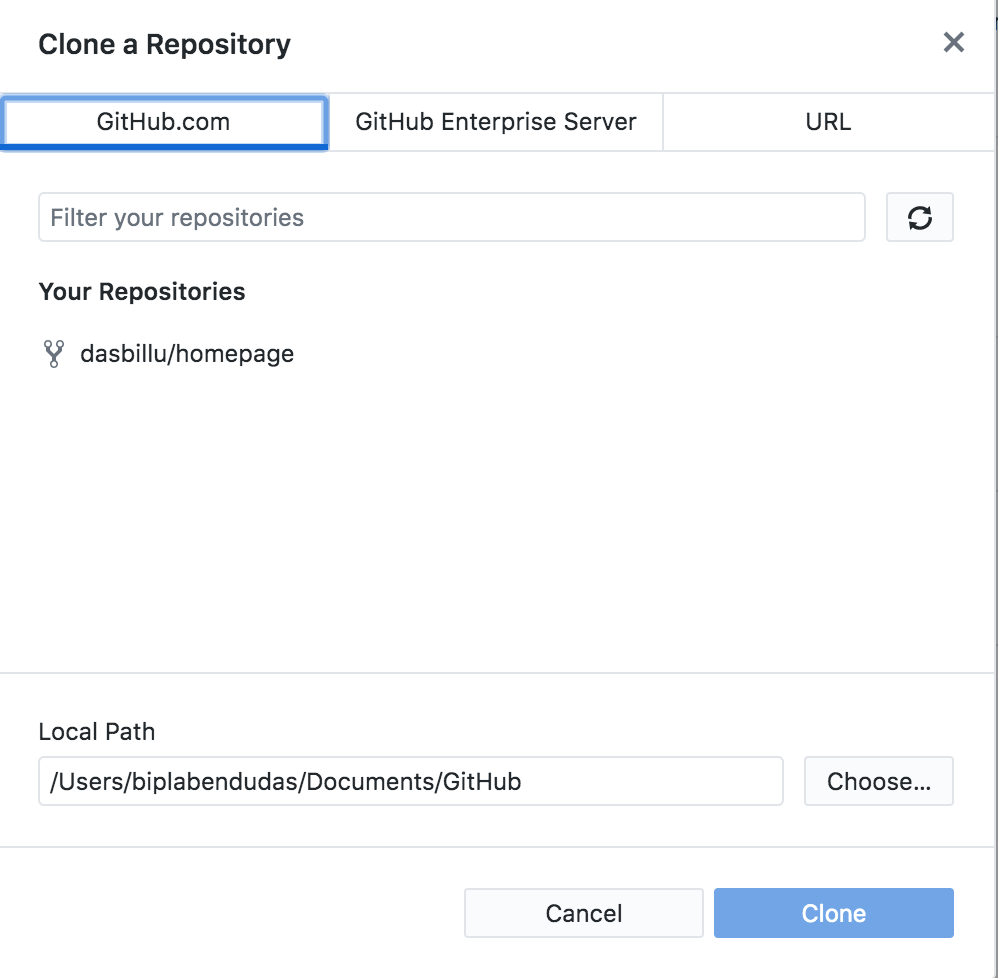
Create a local clone of your repository
Click on the repository with
your_user_name/your_repository_name, and select a path on your folder where the cloned repository will be saved. ClickClone.If everything works fine, your GitHub Desktop should look like below:
GitHub Desktop after cloning is successful
- There are two ways to access the files of your repository:
- While on GitHub Desktop, click on the button
View the files of your repository in XXXXto open the folder. - [Preferred way] Create a dedicated folder for all your GitHub repo for easy access and navigation.
2.1 Customizing the homepage
We will use Markdown and R to modify our html pages; each html has an
associated .Rmd file
To be able to follow along for the next two sections, you will need to have R and RStudio installed on your computer. If you do not have them installed already, you can find instructions on how to install R and RStudio here.
Open the folder in your computer that contains the repository files
Open the
my_dummy_website.Rprojfile which will open RStudio.Now, open the
index.Rmdfile either within RStudio or from your local folder.We will now modify the markdown file.
- the
.Rmdheader - Making hierarchical sections and table of contents
- Highlighting and styling
- Hyperlink
- Pictures and Videos
- create updated html
2.2 Adding/Removing webpages
Create a new
.Rmdfile, add content, and generate a html- For fun, we will do some anlayses on simulated data
- Make two plots
- Embed a table
- Generate a html page
Customizing the
_site.ymlfile to add/remove a webpage- Add two new tabs in the navigation bar
- Connect one new tab to the newly generated html
- Connect the other tab to your resume
- Save the _site.yml file
- Re-create all the html files
Check a local copy of the website to make sure everything looks good
2.3 Render website
VERY IMPORTANT!!!
Make sure you run rmarkdown::render_site() everytime you
make any changes to any of the files.
Step 3: Updating website
- Go to GitHub Desktop on your computer, and select
Current Repository(top-left corner) toyour_repository_name(for me, it’s calledhomepage) - Select all the changes that you want to push, and write a brief
Summary(required) of what the changes were. For example, since we added a new page, we can write,added a new webpage. You can provide more detailed description of the changes in the field below that saysDescription.
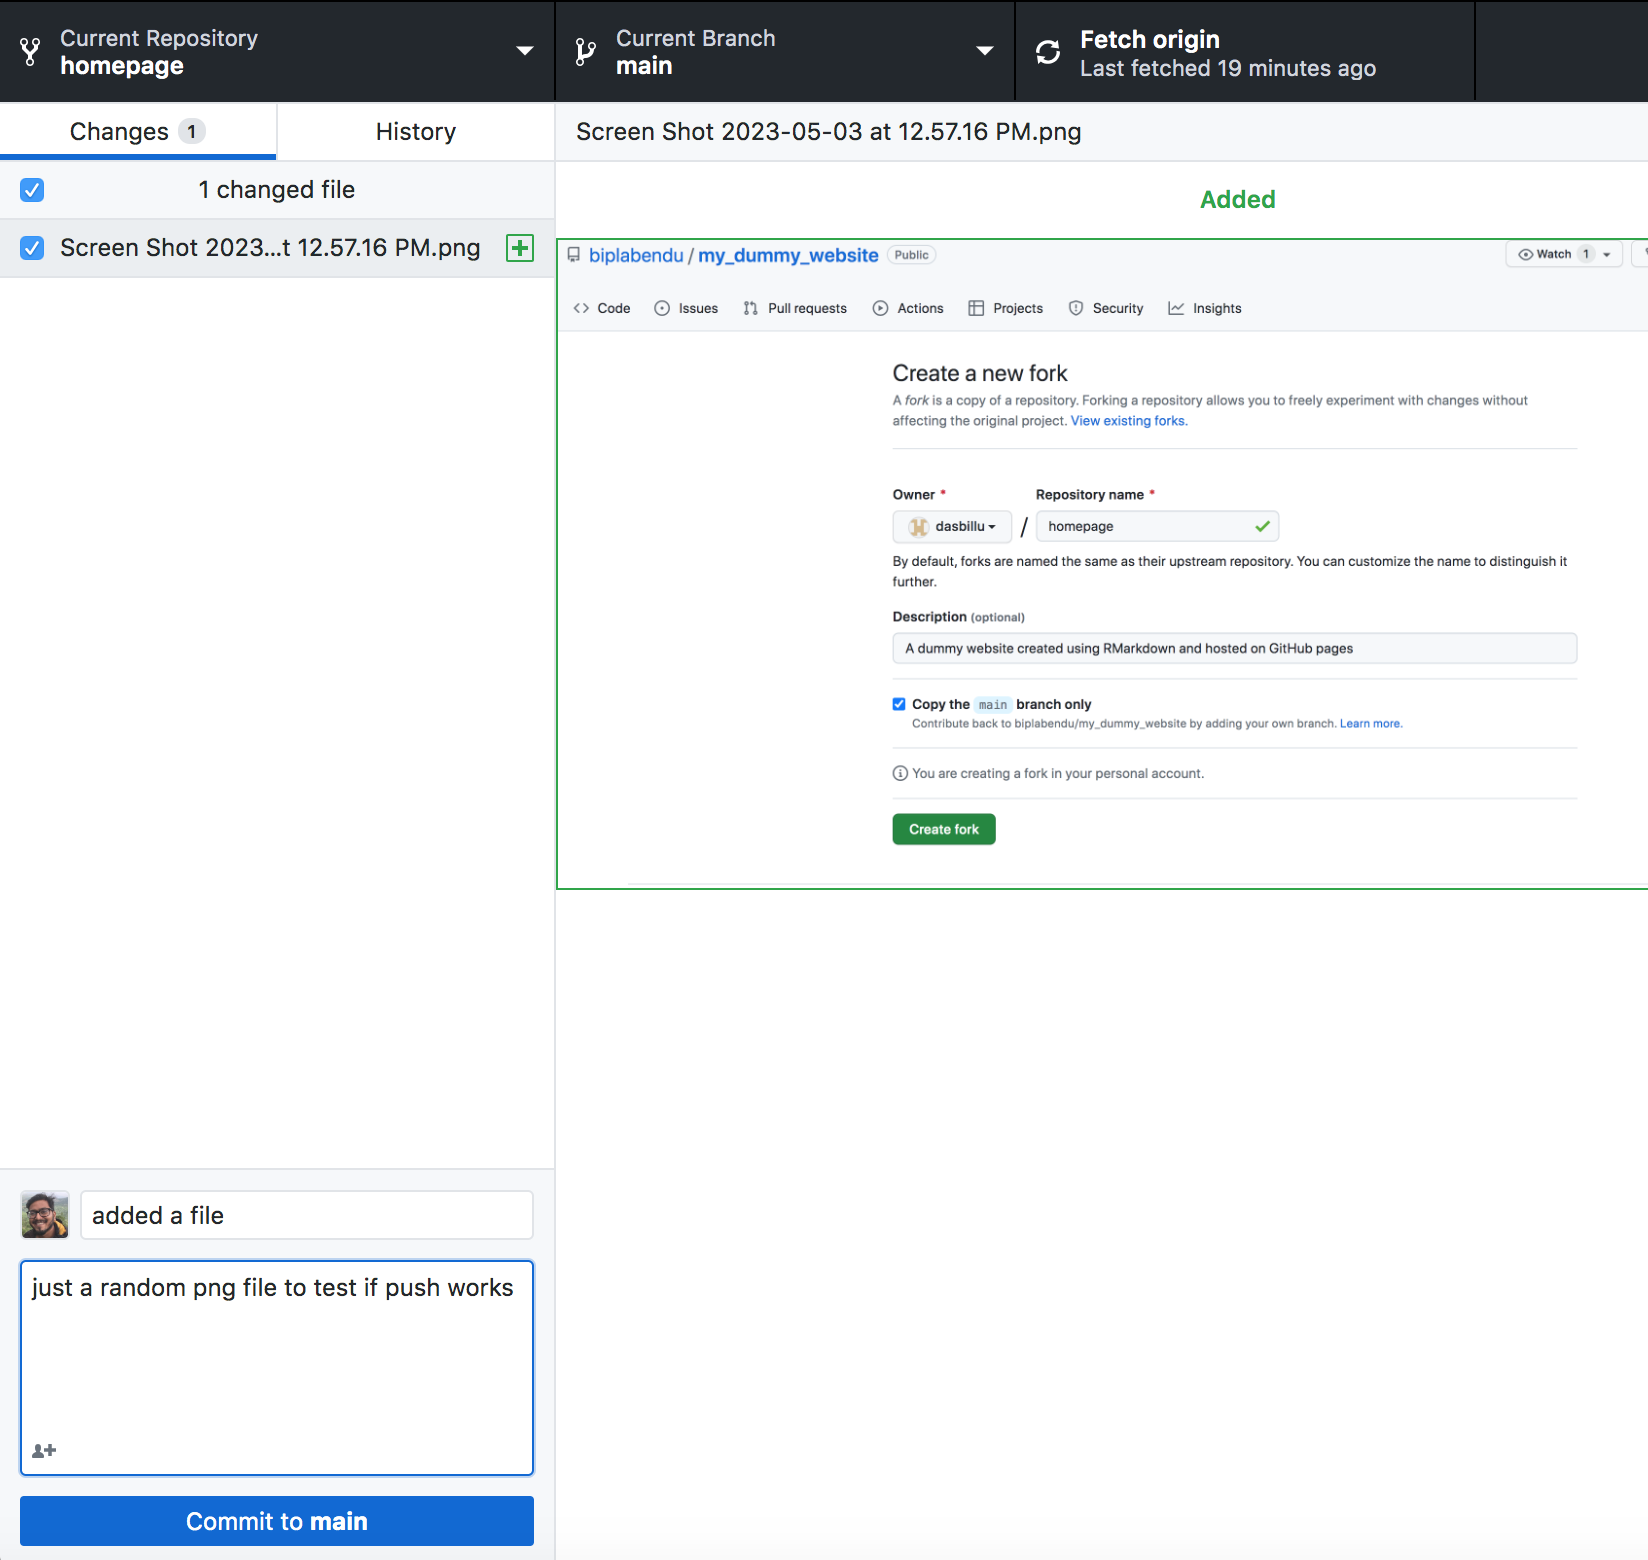
Push changes to GitHub
- Once you are happy with your comments (remember, you are helping
future you, so be generous with your descriptions), do the following in
the specified order:
- click
Commit to main - click
Push Origin
- click
That’s it, you are done!
Your website will be automatically modified and re-deployed in a couple of minutes (usually less than <5 mins, but depends on the size of your website and amount of changes)
Further reading
For more inspiration on customizing the html output, refer to the following manual:
https://bookdown.org/yihui/rmarkdown/html-document.html#table-of-contents
Random features
Customizing font size and style
`Option 1: write HTML code
I am a colored header text (h3).
I am a body text.
But, I am centered text of a different font family and bigger size.
Option 2: use a style.css file
/* Whole document: */
body {
  font-family: Helvetica;
  font-size: 16pt;
}

/* Headers */
h3 {
  font-size: 24pt;
  color: maroon;
}
Allow users to leave comments/annotations
## Hypothesis annotations
# Latest development version
remotes::install_github("r-world-devs/hypothesis")
hypothesis::useHypothesis()